Spiral Vegetable Tart

Our Thanksgiving tradition (at least as of the past decade or so), is to experiment with new and creative dishes. Each of us takes a hand at making a ‘new’ dish and we serve these alongside some ‘standards’–including a lasagna (we are vegetarian and when we were younger, my mother adopted lasagna as our main course), sweet potatoes, mashed potatoes, corn.

Among my offerings last year was this lovely spiral vegetable tart. (It’s taken me this long to get the recipe up) As I was perusing recipes, I found a beautiful picture on bunsenburnerbakery.com and decided that a spiral veggie tart was what I wanted to make. I made some adjustments, including adding pesto and cheese between each layer. I tried different veggies–I thought butternut squash would be awesome but it was not very flexible.

Crust

You can use whatever pie crust recipe you like. I’m a fan of an all-butter pie crust and use vinegar as the primary liquid. This from Epicurious is one of the best recipes I’ve tried. For just a single crust, you’ll want:

  • 1/2 cup (1 stick) cold butter 
  • 1 1/4 cups Flour
  • 1/2 teaspoon Salt
  • 2-4 Tablespoons ice cold water or milk
  • 1 T apple cider vinegar
  1. Put your flour and salt in a mixing bowl.
  2. Cut your butter into small pieces.
  3. By hand rub the butter into the flour mixture until you see pea-sized pieces. Don’t mix too much. Add your vinegar, and then if you need a little more moisture add in the ice-cold water or milk a little at a time.
  4. Form it into a ball.
  5. Wrap with plastic or bee wrap and put in the fridge for at least an hour. Overnight is great.
  6. Now turn your attention to the veggies.

Vegetable layer

Ingredients

  • 1-2 yellow squash
  • 1 eggplant
  • 2 zucchinis
  • 2-3 carrots (you could use purple carrots or purple sweet potatoes for color)
  • 1 sweet potato, orange or yellow
  • 1 C grated cheese (more if you want it really cheesy)
  • 1 jar of pesto (you could absolutely use homemade)
  1. Wash each vegetable.
  2. Peel the potatoes and squash but leave the peel on the eggplant and zucchini for color.
  3. Slice each vegetable thinly with a mandolin. You want long, thin strips. You’ll have to experimentwith the right thickness.
  4. Preheat oven to 350. Spread your veggies on a cookie sheet/roasting pan and coat with olive oil.
  5. Cook veggies until just soft and pliable–roughly 15 minutes.
  6. Now you’ll need to pause on the veggies and turn back to pie crust. Roll out your pie crust and line it into a pie tin. (I like to roll it out onto parchment paper and put the parchment into the pie tin (less cleanup mess).
  7. Blind bake your pie crust on 400 for roughly 15 minutes. Good instructions here: https://sallysbakingaddiction.com/how-to-blind-bake-pie-crust/

Assembly:

  1. Spoon or brush some pesto into the pie crust.
  2. Sprinkle in some grated cheese to form a thin layer.
  3. Start with a thin strip of veggie. Roll it to form a rosette. Spread a little pesto around a strip of veggies. (the pesto acts as the glue between the layers/keeps it together).
  4. Roll that strip around the circle. Repeat spreading pesto and layering veggies until you have a 3″ round or so.
  5. Place that in the middle of your pie. Now start wrapping layers of veggies around that circle in concentric circles…use the same vegetable for each layer.
  6. Stop when your vegetables come to the edge.
  7. Push some cheese and pesto between every few layers and then sprinkle some cheese on top (just a little, you want your veggies to be the star of the show.

8. Place the tart on a cookie sheet and bake at 350 until your crust is golden brown.

Posted in main dish, Recipes, vegetarian | Tagged , | Leave a comment

‘Beyond’ Kofta Experiment

We’ve been experimenting with plant-based meat substitutes for years…and several of them have been quite good. Lately, the “Beyond” and “Impossible” burgers have been getting all the headlines and we’ve been trying them and their make your own versions (faux ground beef) out. This week, for some reason, my mind went to “what if I made a kofta out of them?” The short answer: Yum!!

Traditionally, there are two kinds of kofta. The Middle Eastern meat kind, think spicy meatballs (which I’ve never eaten, because I’m a vegetarian) and their Indian cousin, the malai kofta (often made with paneer, vegetables, and potatoes in a cream sauce).

This experiment is a cross between the two…and possibly a little healthified…there’s no actual “malai” (cream) in this recipe, though it is plenty creamy and flavorful. You’ll see the seasonings are a hybrid between Middle Eastern/East African (Berbere, an Ethiopan spice blend) and Indian (cardamom, garam masala, etc). You could just make the balls without the gravy. They are plenty flavorful and tasty. Upon tasting them, my husband actually asked me why I was bothering with the gravy (a good sign).

The Ingredients

A note on the quantities…this recipe is a little like my grandma’s would have been…if you asked her how much to put in, she would say, ‘uru thuli’ (aka a pinch). The amounts below aren’t precise (I’ll try to do that the next time I make it). I sprinkled the spices in and mixed.

for the Kofte ‘meat’balls

  • 1 package of Plant-based ground beef (Beyond makes one). The one I actually used came from Safeway and looked a little scarily like ground beef, stringy lines and all.
  • 1 teaspoon/a few healthy shakes Berbere seasoning
  • 1 t turmeric
  • 1-2 t garam masala
  • 1 t garlic powder
  • 1 t cinnamon powder
  • 1 egg (optional, used as a binder)
  • 1 T grated fresh ginger

for the Gravy

  • 2 cans of crushed tomatoes (I used Trader Joe’s fire roasted tomatoes, which have a kick from chillies already in the can)
  • 3 pods of cardamom
  • 3-4 cloves
  • 2 t garam masala
  • 1-2 t berbere
  • 1 t turmeric
  • 1 t Asafoetida (if you don’t have it, skip)
  • 2 t cinnamon
  • 1 T fresh ginger, grated
  • 1/4 cup pistachios (Note: the original recipe I read to form this experiment suggested 14 cashews…if I had cashews I would have used them, but we were out, so…pistachios)

The Method

Kofte

  1. Put your faux ground in a big mixing bowl. Toss in the spices and an egg. Mix around well with a fork. Form into small balls.
  2. Coat a heavy skillet (i used cast iron) with oil. Heat the oil up and then add your kofte balls in.
  3. Cook for a minute or so on each side–you’ll see them brown. As they brown, turn them and move the balls around the pan so they cook evenly (my skillet often is hotter on one side than the other).
  4. When they are golden, set aside. They should be a little crispy. (if you’ve ever eaten Trader Joe’s Meatless Meatballs, that’s the look and texture I was going for).

The ‘Malai’ Gravy

  1. Put all of the ingredients in a blender, cover and blend until smooth.
  2. Pour into a saucepan. Add about 1/2 cup water. Cover and cook on medium for about 15-20 mins (Longer is fine, it’ll thicken up a bit.)
  3. Reduce to a simmer. Drop in your balls and let them soak for about 10 mins.
  4. Enjoy!

Posted in main dish, Recipes, test kitchen, vegan, vegetarian | Tagged , , , , | Leave a comment

A Green Zebra: Dark Chocolate Pistachio Cake

The birthday boy sheepishly asked if I’d make him a cake the other day. Sheepish because even though most years, I make a cake, last year I ordered cupcakes from a local cupcake shop. This year, with a little boy taking up most of our time, he wondered if that was the course we were on again.

But, of course I’d make him a cake. The question was, what cake. Chocolate of course–always chocolate, preferably dark chocolate. If you’re going to make and eat cake, it should be good cake…the best cake–this is something both of us agree on. A few weeks ago, I sent him a recipe for a Guinness and Whiskey chocolate cake. I thought he’d go for that. But he was nostalgic for a cake I’d made many years ago–a dark chocolate pistachio cake. The original cake was a take on a Giada DeLaurentiis recipe, a dark chocolate devils food cake with mascarpone cheese filling (note, I just learned how to spell that word! I’ve been spelling and probably saying it wrong for years!) and pistachio crunch (hers was hazelnut). A few years ago, I tried something a little different–a chocolate peanut butter cake–a Smitten Kitchen recipe. It was super awesome. 

This year, I decided to do a melding of both of these super tasty recipes. This recipe involves several steps (and a few hours):

  • A dark chocolate cake (Smitten Kitchen’s recipe)
  • A Swiss merengue butter cream it’s so much better than your average butter cream. The difference? American butter cream is basically butter and powdered sugar whipped up–so it’s a little heavy and super sweet. Swiss merengue butter cream involves whipping egg whites and sugar over a pot of water (aka double boiler) and then whipping the whites. It’s silky smooth and pillowy soft. 
  • A homemade pistachio paste (do yourself a favor and get pistachios that already have the shells removed. I tried but the store delivered the ones in shells, so queue a half hour of peeling to get 2 cups of pistachios. tiresome.)
  • Pistachio Crunch (I used this recipe)
Birthday cake!

The Cake: (thanks Smitten Kitchen for an amazing a moist dark chocolate cake recipe!)

Makes an 8-inch triple-layer cake

2 cups (250 grams) all-purpose flour
2 1/2 cups (500 grams) sugar
3/4 cup (about 65 grams) unsweetened cocoa powder, preferably Dutch process
2 teaspoons baking soda
1 teaspoon salt
1 cup (235 ml) neutral vegetable oil, such as canola, soybean or vegetable blend
1 cup (240 grams) sour cream
1 1/2 (355 ml) cups water
2 tablespoons distilled white vinegar
1 teaspoon vanilla extract
2 large eggs

1. Preheat the oven to 350 degrees F. Butter the bottoms and sides of three 8-inch round cakepans. Line the bottom of each pan with a round of parchment or waxed paper and butter the paper.

2. Sift the flour, sugar, cocoa powder, baking soda, and salt into a large bowl. Whisk to combine them well. Add the oil and sour cream and whisk to blend. Gradually beat in the water. Blend in the vinegar and vanilla. Whisk in the eggs and beat until well blended. Scrape down the sides of the bowl and be sure the batter is well mixed. Divide among the 3 prepared cake pans.

3. Bake for 30 to 35 minutes, or until a cake tester or wooden toothpick inserted in the center comes out almost clean.

Pistachio Paste

sure you could use store bought, no problem. but this is pretty easy, too. (and not sweet, like store bought)

2 Cups pistachios, shelled (trust me, you don’t want to be standing around shelling them) 2-3 cardamom pods, crushed (I just crushed them with a rolling pin, but you could grind them up)

Boil some water in a saucepan. Turn off the water. Pour your pistachios into the water and let stand for 2 mins. then peel off the brown skins. Why? you’ll end up with a greener paste.

Put the pistachios into a food processor and process until smooth. that’s it. it’ll take a few mins.

The Swiss Meringue Buttercream

I consulted lots of recipes and tutorials, including Liv for Cake, American Cake School, and Martha Stewart. I thought this was pretty helpful: https://livforcake.com/swiss-meringue-buttercream-recipe/ but in the end I used a combo of recipes

  • 5 egg whites (separate the whites and yolks ahead of time and keep in separate bowls). Use the yolks for something else
  • 4 sticks of butter, room temperature and cut into 1 Tbs pieces and then into small cubes
  • 1 1/2 cups of powdered sugar
  • 1 T vanilla extract
  • 1 T cinnamon

Note: you’ll need a whisk, a thermometer, and a stand mixer for this

  1. Heat water in a saucepan.
  2. In the bowl of your stand mixer, put your egg whites and sugar.
  3. Place the bowl on top of the hot water (but make sure the water doesn’t touch the bottom of your bowl). Whip your egg whites and sugar over the hot water until it reaches 160 degrees.
  4. Remove from heat and whip in your stand mixer on medium to high until it reaches stiff peaks and cools down to room temperature, probably about 10 mins
  5. Now lower the mixture speed to low and add your butter one cube at a time (some recipes say 1 T at a time but I think it is too much. You’ll be at this for a few mins until all of the butter is incorporated
  6. then fold in the pistachio paste

The pistachio crunch: I used the one from this recipe: https://www.epicurious.com/recipes/food/views/lemon-pistachio-crunch-cake-109405

  • 2/3 cup sugar (I used powdered sugar)
  • 1/4 cup (1/2 stick) unsalted butter
  • 1/4 cup water
  • 1/2 teaspoon baking soda
  • 1cup natural unsalted pistachios (about 5 ounces)
  • cinnamon and vanilla
  1. Line a baking sheet with wax paper or foil
  2. Add the butter, sugar, and water to your pan. On medium heat, stir until the sugar dissolves. Lower the heat and stir constantly with a spatula until it reaches an amber color (think caramel).
  3. Add the baking soda (it’ll foam).
  4. Add the nuts, cinnamon, and vanilla. Stir well
  5. Working quickly, dump out the contents onto the baking pan and spread out. Let cool and then crush up roughly (like toffee)

still with me? Here’s how this all comes together

A layered slice

Cool your cakes well. Make sure they are leveled (hint, a cake leveler when baking would help, and I need to get some!!). My cake had a wee bit of a lean.

Pile 1/3 of the pistachio buttercream onto the first layer. You could add on some crunch (I didn’t because i didn’t have shelled pistachios yet, the husband had gone out to get some but I think it’d be better). Add the second layer, and repeat the buttercream. Repeat the buttercream on the third layer. Refrigerate (i refrigerated overnight). I then decorated with the crunch and some chocolate ganache I had from another recipe. I put the crunch around the top and the sides


Posted in Recipes | Tagged , | Leave a comment

Homemade Greek Yogurt

I’ve been experimenting with yogurt making again. This time, I wanted to make greek yogurt. I found out it was pretty easy.

The hardest part for me in yogurt making is incubating it. My oven doesn’t have a pilot light that emits enough heat, and just wrapping it doesn’t seem to work. I even bought a yogurt maker a few years ago (it’s been lying around unused for a while). This round, I put the yogurt maker head to head with the crock pot. Both did pretty well, but the yogurt maker requires one particular pot (a small one). Whereas the crock pot can handle an entire gallon of milk. Winner? Maybe. One small problem: I realized that my crock pot was making yogurt cheese at the bottom (it’s getting too hot). So this time around, I shut the crock pot off part way–after about an hour, and put a towel around it. And it worked. Another thing I’d like to try is a dimmer switch i read about (i’ll let you know if I try it and it works).

greekyogurt

one perfect bite

Ingredients

  • 1 Gallon of whole milk (you could do less, but if you are going through the trouble, you might as well make a full batch). you can use whatever % you like, we’re currently experimenting with drinking whole milk so that’s what we’re using
  • 1 cup of yogurt (as a starter). Make sure this yogurt has live active cultures, or you can use a cup from your previous batch. You might not need this much starter, but it worked pretty well when I did it so I’ve been continuing to use this

Equipment:

  • a large pot
  • a thermometer
  • crock pot
  • a towel or cheese cloth
  • a strainer

1. Bring your milk up to 190 degrees. I do this on the stove in a heavy cast iron pan, on medium, stirring periodically. You could do this in a crock pot, but it will take an hour or so. Once you start seeing bubbles, check the temperature.

2. Let it cool down to 110 degrees. You can put it in the fridge, or try ice cubes. Or just wait around. Check the temperature periodically. Yogurt is pesky like that.

3. When it hits 110 (or 100-110 degrees), add in your starter. Gently mix it in–it doesn’t need to be fully incorporated.

4. Pour the whole batch into the crock pot. Put it onto the “warm” setting. periodically check the temp and then turn it off after about an hour. put a towel around the top (keeps the heat in). Go to bed.

5. In the morning, when the yogurt is set, set up your straining system. You could just put your strainer in a sink, but you’d lose all the whey. I use a large rubbermaid flat round bowl at the bottom. I put a little container inside it and balance my strainer on top of that (essentially you want space between the container and the strainer bottom).

6. Put a cheesecloth or a tea towel inside the strainer. Pour the yogurt in. Let it strain for at least an hour. Experiment with the straining time you like–2 hours seems to be just thick enough. On a few batches, I’ve moved the strainer to the fridge after the first hour and left it there until i’ve come home from work…that gets really, really thick. think cream cheese or butter.

My new favorite breakfast is yogurt, a few berries, a spoon of cashew or peanut butter, and and a few pecans. It keeps me full all morning. And is a great balance of fat, carbs, and protein.


Posted in breakfast, Recipes, side | Tagged , , | Leave a comment

Summery Gazpacho Experiment

Our garden suddenly produced a bounty of small tomatoes and tomatillos. We were also going to be entertaining a bunch of people on our rooftop, so I needed to find something cooling to serve. We thought, gazpacho…but I wanted to find a gazpacho that didn’t need bread as a thickener/filler. Enter: the humble avocado.

gazpacho

I made two different versions before settling on the right one. The first was mostly avocado, lime, cilantro, green tomato. It actually made a great salad dressing, but was a little tart to be gazpacho. The second was the real winner. Thick (but not too think to sip), balanced flavors that allowed the tomato to shine. I followed this as my base recipe, and then experimented. I used balsamic instead of sherry vinegar. I used more avocado. I added cucumber and bell pepper to the base.

This makes a pretty big batch. 

Ingredients:

  • 1 avocado or 1 1/2 depending on thickness desired 
  • 1 pint of cherry tomatoes
  • 2 tomatillos
  • 4 cloves of garlic (yes it was garlicky. you can cut down)
  • 1/2 cucumber
  • 1/2 bell pepper
  • 1/2 jalapeno (or as spicy as you’d like it)
  • 2 T olive oil
  • 2 scallions
  • 2 T balsamic vinegar 
  • a dash of lime juice
  • 1/4 c fresh cilantro and basil 
  • salt to taste

The method:

Easiest recipe ever. Throw all ingredients into a blender. Blend until it hits the consistency you’d like (i stopped somewhere between chunky and pureed).  If it is too tart add a little more balsamic. Or more tomato. Add ice if you need to eat it right away, or put it into the fridge for a bit first. Add a pinch or two of salt at the end.

Posted in Recipes | Leave a comment

Easiest Dulce De Leche

Last winter, I was looking for good cookie recipes, and came up a great dark chocolate shortbread cookie with dulce de leche inside. (In an upcoming post, i’ll give you that recipe). But today, i’ll give you the first step. It’s a good summer recipe because it involves zero standing around a stove. Nor does it require you to turn on a hot oven for hours.

Equipment

  • A crock pot

The ingredients:

  • 2 cans of sweetened condensed milk (you could do just one, but while you’re using the electricity why not double it? trust me, you’ll want it for later. Oh and it keeps for a long time)
  • water (to fill your crock pot)
  • scm

    Remember this stuff? imagine it cooked down to a creamy, rich, luscious caramel!

The method:

  1. Peel the label off the cans if you can. If not, no biggie, they’re getting a bath and it’ll come off later.
  2. Place your cans of condensed milk into your crock pot
  3. Fill the crock pot with water to cover the cans entirely
  4. Let it cook on low for 8 hours (yup, a perfect recipe to pop in before bed time).
  5. Pull out the cans with tongs so you don’t burn yourself.
  6. Let it cool. It’ll be worth the wait and much less dangerous. Don’t try to open while hot.
  7. Pop it open. Spoon it out onto whatever (just a spoon? over ice cream? a cookie?). It’s delicious.
Posted in dessert, Recipes | Tagged , , , | Leave a comment

Peoples’ Choice Cornbread

The blog hiatus is over…I now work normal hours again and have time to do things like cook and write!

peopleschoiceaward
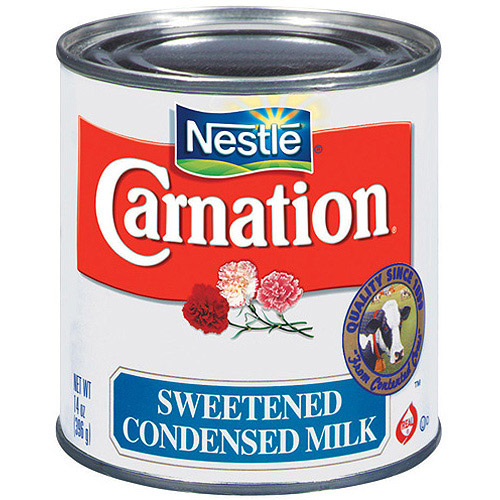
This week, my husband once again nudged me to enter a cooking contest–this time a really fun neighborhood event–and I won a “peoples’ choice award”! About the event: Every year, a group of fun and eclectic neighbors gather to see whether whose cornbread recipe wins top prize. Back in 2012, we happened upon this group, and I entered and won the peoples’ choice award.  This year I won in this category again! The peoples’ choice category is fun–it has fewer rules about what can go in it (the other category is “traditional” cornbread), it is judged by everyone, and the people signal for their choice with jelly beans!

So what makes this recipe special? Good butter, yogurt, and jalapeno. Let me start by saying that the recipe’s base is a recipe by butter queen Paula Deen. In true Paula fashion, it has lots of butter. 

If you have read any of my other posts, you know that I don’t follow recipes slavishly.  So what did I change?

  • purplecornI made the butter that goes in it myself! 
  • I used honey instead of sugar. And the honey is local–made at our community garden
  • I used purple cornmeal (it’s what I had). It turns out a wee bit purply-grey…and when mixed with jalapeno it didn’t look as beautiful as it could have, so if you want to use yellow instead, go for it)
  • I used yogurt instead of buttermilk
  • Credit for this next idea goes to my husband–blend up jalapeno and some scallions with the yogurt . I did, and it spread out the taste without too much of a kick. winner!
  • I put scallions into the batter, too

The ingredients

  • 7 T butter melted (In grams I used about 88g). plus another 1/2-1 T to put on top.
  • 1 C Cornmeal
  • 3/4 C all purpose flour
  • 1/4 cup habanero or pepper jack cheese
  • 2 eggs
  • 1/2 jalapeno (you can use more if you like it spicy. I just wanted the hint)
  • 3 green onions/scallions
  • 2 T honey (i started with 1 and thought it didn’t have enough)
  • 1 1/2 teaspoons baking powder
  • 1/2 teaspoon baking soda
  • 1/2 teaspoon salt
  • 1 1/2 cups yogurt (you can use buttermilk, too)

blue-corn-bread5The Method

  1. Preheat your oven to 425. Line a square 8×8 pan/ round baking pan/ or a cast iron skillet with parchment paper and rub with oil or spray with cooking spray.
  2. Mix up your cornmeal, flour, baking soda, baking powder and salt
  3. In a blender, blend up the yogurt, jalapeno and 1/2 of your scallions until you have a smooth mixture. It’ll be green.
  4. Crack your eggs into the bowl and lightly beat them. Add in your melted butter and mix. It’ll be dry.
  5. Add your yogurt mixture tho the bowl.  Mix well. Add in your cheese and the scallions.
  6. Pop it into the oven for 20-25 mins (mine needed the full 25 mins). Test doneness with a knife.
  7. I topped my baked cornbread with a little butter and let it melt.
Posted in Recipes, side, vegetarian | Tagged , , , , , , | Leave a comment

Homemade Cultured Butter

About a year ago, I started buying “fancy” butter–by fancy I mean European cultured butter. It was creamier and tangier (that’s the “cultured” part–it is made with yogurt and the cultures are left to grow for a day or two). The price had dropped and it was about the same price as the other butter I was buying…but way tastier.  Then a recipe popped up on my newsfeed for instructions on how to make it. One day last week, I finally had the time to try it.

JPEG image-B2F09B7F49EA-1I scanned several recipes, including one from Food and Wine, one from America’s Test Kitchen, and one from the Kitchn.com, and blended the instructions from three of them. The pictures in the America’s Test Kitchen version are really helpful–but I liked the idea of using my stand mixer to do the work (Food & Wine). And I liked the use of Yogurt and smaller portion size from the Kitchn.com recipe (for my first try i didn’t want to make a whole pound of butter!)


The ingredients

  • 1 pint heavy cream
  • 1/4 C  yogurt (I used Greek nonfat, you can use full fat. Whatever you use, just make sure it has live active cultures in it)

Really, that’s it!

The method 

this is the part that’s a wee bit more complicated. but not very

  1. In a bowl or tall jar, combine heavy cream and yogurt. Mix well and cover with saran wrap or foil. I used the jar of a smoothie blender. Set aside for 24-48 hours (I left it out for about 24 hrs, then in the fridge for another day until I had time to churn it).
  2. Add 1/4-1/2 t salt, depending on how salty you want it to be.
  3. When you are ready to churn, put your mixer bowl in the fridge for an hour (*I didn’t do this and it came out well anyway)
  4. Set up your stand mixer. If you have a pouring shield, you’ll want it. If not, cover your bowl with plastic wrap after you pour the cream in and put the whisk attachment on.
  5. Beginning on low, ramp up the speed on the stand mixer. Churn your butter on high for about 4 minutes. (when it starts to form butter, it starts to splash–which is why you want the cover the bowl).
  6. Pour out the buttermilk into another bowl (it’s good and you can use it in something else). Pour cold water and ice into the mixer bowl. Your butter will start to harden and should form a ball. Mix around. Pour out the water, and replace it with fresh water and more ice if needed. do this 3-4 more times until the water the butter is being “rinsed” in no longer foggy looking.
  7. Roll into a log on a piece of parchment.
  8. Refrigerate. (I refrigerated half and froze half)
Posted in Recipes, vegetarian | Tagged , , , , | Leave a comment

The Award Winning Moussaka


Thanks to my publicist and sous-chef, aka my husband’s encouragement and assistance, I entered a cooking contest the other day, and I was crowned the best home cook in DC yesterday (thanks CookNook!). I’ll share the recipe here, but first I have to say that I feel pretty honored to have been chosen from among a field of 10 other great cooks. And I really couldn’t have done it without the nudge from my husband–not to mention his skills as my maitre d’, telling people about the dish. And from my friend Tala, who helped me to put moussaka into a hundred little cups.

(DC friends, an aside–check out CookNook–a cool new startup that offers home cooked meals at really affordable prices. Healthy, tasty food, homemade and delivered to your doorstep! Like those meal kit delivery services–without the cooking!)

IMG_4710So the recipe I used, which the judges said tricked them (they didn’t realize it was meat free) was a teensy modification of this recipe I posted a few months ago, which I think is pretty good itself. What’s different? A mixture of seitan products, instead of one, and an addition to make my bechemel (or faux-chemel) a little creamier. Also the addition of mushroom farro on the side.

Ingredients for the Moussaka (to make one 8×10 pan’s worth–serves 8-10)

  • 3 large Italian globe eggplants or 6 smaller Asian eggplants (I used smaller ones in the contest)
  • olive oil to drizzle over eggplant
  • 4 cloves of garlic
  • 1 sweet onion
  • 14.5 oz tomato puree (strained tomatoes)
  • 1 cinnamon stick
  • 1/4 t nutmeg
  • 1/4 t clove (3-4 cloves)
  • 1/4 t all spice (3 pods)
  • 1/4 t oregano (fresh is better)
  • black pepper
  • 1/4 t thyme (or a sprig of fresh thyme, which is what I used)
  • a few leaves of fresh basil
  • 3 eggs
  • 8 oz creme fresh
  • 2 oz marscapone cheese (you can use greek yogurt or ricotta, as I did previously)
  • 1/8 c parm (could add more if you want)  I used “Robusto” flakes in this one
  • crushed red pepper flakes
  • fresh parsley for garnish
  • 4 oz of upton italian flavored seitan crumble
  • 1 field roast Mexican Chipotle seitan sausage (*note you could use 2 links and moit the crumble)

Divya's-moussaka+farro


The Method:
Note: This recipe involves getting several things started at the same time, and keeping them going. Here’s a suggestion for how I did it. It seems difficult, but honestly it’s not…

A. Eggplant

  1. Peel your eggplant. Then slice into 1-2″ pieces. I sliced them lengthwise for my first few tries. yesterday I did rounds. I’m not sure which method is better.
  2. I put down parchment into a baking pan, and then spread my eggplant into a single layer. Drizzle with olive oil and sprinkle with salt.
  3. Now you have two options: 1) broiler: turn your broiler on low, and put in one tray at a time for 5 mins each, flipping and returning to heat for another 5 mins. or 2) oven: preheating your oven and turning it to 450. Cook for about 10 mins or until your eggplant is softer and has a little color on one side. Flip each piece with tongs and return to the oven until the other side is lightly golden. This allowed me to do 2 trays at once and did not require me to be as hyper vigilant about burning as I need to be when broiling.
  4. Set your cooked eggplant aside (they should have a little shape and give still, but be soft and taste fully cooked)

B) Tomato Sauce

  1. Chop your garlic, onions, and shallot
  2. Chop your herbs and set aside in a bowl
  3. In a sauce pan, sautee your onions, garlic, and shallot in a little olive oil.
  4. Add in your tomato puree (I like the kinds that come in a vacuum sealed box or in a jar rather than from a can).
  5. Add your cinnamon stick, all spice, clove, oregano, thyme, basil, red chilli flakes, and salt to taste.
  6. Cover and simmer on medium until it starts to boil. Turn down to low and simmer until you are ready to use it. (at least 20-30 mins. You’ll know when it stops tasting like just plain old puree and starts tasting like pasta sauce. that’s what you are going for)

C) Bechemel or faux-chemel (why faux? because we’re not using heavy cream and lots of cheese)

  1. in a saucepan, add in your creme fresh, marscapone, and ricotta. turn it on medium and stir.
  2. When it starts bubbling, turn it down to a simmer.
  3. Add in your 3 eggs, mixing in well–quickly.
  4. Add in a sprig of thyme, a little basil, and a few turns of black pepper. I added chilli flakes to it as well.
  5. Cover and let this simmer for 20 mins too.

So far, that’s a bunch of steps, but all pretty easy, right?

D) Seitan

  1.  In a normal moussaka recipe, this is where you would cook up some lamb. Instead, we are going to use seitan.
  2. Add your crumble and your “sausage” log to a food processor (or blender) and process into a finer crumble. (I used the specific products above for a mixture of spicy and plain. You could use all of one, and none of the other, or you could use other flavors or brands–experiment. My key here was that I wanted one to have a little spice–to emulate what people tell me chorizo tastes like.
  3. Pour this mixture into a skillet and warm it for 4-5 minutes.

FullSizeRender

Layering it all together. let’s bring this home.

  1. Preheat your oven to 350
  2. In a casserole dish/corning dish/8×10 baking pan, I put down a piece of parchment…makes clean up easier later. You can omit…but you’ll have more scrubbing to do.
  3. Add a ladle of your tomato sauce
  4. Put down a flat layer of eggplant slices
  5. Add a layer of crumble
  6. Top with a layer of your bechemel sauce
  7. Repeat 2 more times or until you use all of your ingredients up.  Your last layer will be white.
  8. Pop the whole thing into the oven for 35 minutes or until your top is a little golden and the cream is thickened. Slice up and enjoy!


Served with: Mushroom Farro

  • 1 cup farro
  • 1/2 onion
  • 1/2 shallot
  • 1 clove garlic
  • 2-3 stalks green onions
  • 2 cups vegetable stock
  • 1/2 c water (if needed)
  • 1 box of shitake mushrooms
  • 1 box of mushroom blend
  • 1 oz truffle oil (optional)
  1. chop and then sautee your onion, garlic, and shallot in a little olive oil.
  2. Add your farro to a sauce pan and toast lightly (1-2 minute)
  3. Add your stock and bring to a boil
  4. Reduce to a simmer and cover. Cook 20-30 mins. You want it to be firm and a little chewy, al dente, like pasta, not too much bite that you’re constantly chewing, and not mushy.
  5. In a skillet, cook your mushrooms with a little olive oil until they release water and start to brown a little.
  6. Add mushrooms to your farro and drizzle on the truffle oil if you’re using it.
  7. Chop your scallions and mix in.


Posted in main dish, Recipes, vegetarian | Tagged , , , , , , , , , , | 3 Comments

Squash curry experiment


A few weeks ago I went to the garden and picked a monster squash. It was gigantic and it was bumpy and yellow. I had no idea what it was– I think it’s some kind of fall winter squash. Anyway yesterday I finally decided to use it and some zucchini. To this I added  a can of coconut milk that I opened when we ran out of milk (yes it’s been that kind of week) and decided to combine that with whatever else was in our Fridge. The results were pretty awesome. 

  •  Half a can of Coconut milk
  • 1 big squash
  • 2 zucchinis
  • 1 red onion
  • 1 block tofu (see freezer trick below)
  • A bunch of scallions
  • 1 T almond butter
  • 1T soy sauce
  • 1/2 T teriyaki
  • 2 squirts of sriracha
  • 1 T garlic
  • 1T ginger 
  1. The only way to cut the squash was to microwave it. So I microwaved it for five minutes at the time, 3 times for a total of 15 minutes. And then scraped out the insides
  2. Chop the onion and sauté it
  3. Check the zucchini and added to the onions then add to your other squash
  4. Answer coconut milk to this mixture and simmer
  5. Squeeze out the water from the tofu. Cut it into cubes. In a skillet with a little olive oil cool it until golden and a little crispy on each side. (A little trick I learned and tried out with this recipe: Freeze the block of tofu. Then microwave it. Then squeeze it out. This makes for crispier tofu without frying it)
  6. In a bowl mix up the remaining ingredients. At this to your mixture as well and cook for another 5 to 10 minutes on medium
  7. Top with scallions and serve. Note it won’t have a lot of sauce 

Posted in Recipes | Leave a comment

Moroccan Lemon, Olive, and Cinnamon Chick’n 


This  recipe was inspired by a recipe on epicurious and is part of an effort to turn expand our palates and adapt meat recipes that my husband might like into vegetarian ones. 

  
Ingredients:

  • 1 onion
  • 1/4 preserved lemon (original recipe uses fresh)
  • 1/2 fresh lemon sliced into wedges
  • 4 pieces of Gardein chick’n scallopini 
  • 2 Cups of low sodium vegetable broth
  • 1 T caper
  • 1/2 c olives (the original recipe called for green olives)
  • 2 Garlic Cloves
  • 1 T paprika (or use berbere which has all of these)
  • 2 T ground cumin
  • 1 T ground cinnamon
  • 1 t turmeric
  • 1/2 T ginger paste 
  • 1 T olive oil
  • 1 scallion
  • 1 spring cilantro
  • 1 sprig mint
  • 1 T potato starch (corn starch would be fine)–for thickening the sauce
  • 1 T pepitas

The method
1. Slice onion into thin shreds. In a heavy pan (I used my LeCreuset French oven), sautee onion with 1 T of olive oil until golden. 
2. Add spices, ginger paste, 1/2 of the preserved lemon, and broth. bring to a boil 

3. Reduce to simmer and add your gardein “chick’n.” Cook for about 30-35 minutes 

4. Remove the chik’n pieces and add your potato starch to thicken the liquid into a sauce. Add the chick’n back and add the capers and olives. I sprinkled on a few more shakes of cinnamon and paprika at the end.

5. Before serving, add cilantro, mint, scallion, and pepitas  

I served this with a version of coconut farro.

Posted in main dish, Recipes, vegetarian | Tagged , , , , , | Leave a comment

Edamame burgers

I received this recipe from Cooking.com in my inbox and thought “hey I have all of the ingredients!” It seems like a lot of stuff but you probably have a lot of it.  And then as I got to cooking, I did a little futzing.   

If you already have cooked quinoa use it. I added a half cup of daal (the squash daal) that was left in the fridge looking unloved. I also had a lot of fresh greens so I used some. And mushrooms. And I added in a wee bit of jalapeño and BBQ sauce. And zucchini (I didn’t have much carrot, which the original recipe called for). I also baked mine (rather than skillet cooking or frying) and topped it with caramelized onion, sautéed mushrooms, avocado and fresh tomato–no bun needed.

  • 2 small zucchini
  • 1 onion
  • 1 clove garlic
  • 1 carrot shredded
  • 1/3 c frozen edamame shelled
  • 1/2 c cooked lentils (daal)
  • 1 1/4 c cooked quinoa 
  • 1/2 c Panko breadcrumbs
  • 1/2 jalapeño
  • 1 poblano pepper
  • 1/2 c gourmet blend mushrooms (topping)
  • 1/2 portabella (inside)
  • 1/2 c shredddd greens (I used A kale, chard, arugula combo I precut an mixed in a container for the week)
  • 2 eggs
  • 1/2 t salt
  • A few turns of black pepper
  • 1 tomato
  • 1 avocado

1. Cook the quinoa. I use a 1:1 ratio
2. Microwave and shell the edamame. Mash them a little

3. Chop and sauté the onion and garlic. Set a little aside as a topping (1 spoon per burger)

4. Shred the zucchini and carrot. Cook that along with your  mushrooms, and poblano until they are soft. Prob about 7-8 mins. 

5. Shred Wilt your greens for a few minutes too 

6.in a bowl combine your ingredients. (except the avocado and tomato) mash and mix the quinoa, daal, edamame, and veggies together. Add Panko and eggs. 

7. Form into patties. I baked mine on a cookie sheet at 350 until they held together about 25-30 mins. Spray with cooking spray or drizzle with olive oil. You can flip halfway and decide how much longer you think they need. You can also cook in a skillet as the orig recipe directs–I just find that things like this need a lot of oil or they stick.

8.  I served with sliced tomato, avocado, and onion. Buns are optional

Ps. If you don’t have cooked daal try Try Joe’s precook  lentils or cook skip

Original recipe: http://www.cooking.com/recipes-and-more/recipes/edamame-carrot-quinoa-burger-patties-recipe?CCAID=cknwrdne05970at

Posted in garden produce, main dish, Recipes, vegetarian | Tagged , , | Leave a comment

Coconut Faro


This is a versatile dish–change out veggies or flavoring to go with different meals. I served this version with the mango tofu. And subsequently made a version with more Indian flavors to go with the daal I posted the other day (cinnamon, cardamom, garam masala)

The ingredients 

  • 1/2 can coconut milk
  • 8 oz vegetable stock
  • 1 cups farro
  • 1 bell pepper
  • 1 green onion
  • 1/2 portabello mushroom
  • 1/2 red onion
  • 1/2 green mango, shredded
  • 1/2 jalapeno
  • shredded basil and cilantro 
  • sea salt

  
The method 

  1. Soak Farro for 20-30 mins 
  2. Sautee onion, bell pepper, jalapeno and mushroom
  3. Add farro and stock and cook for 10 minutes. Stir in coconut milk. Cook for another 10 mins or until done. 
  4. Top with green onions, shredded mango, and basil. Season with sea salt as needed.

Posted in Recipes, vegetarian | Tagged , , | Leave a comment

Mango Tofu


A taste of summer and the islands, brought to you by that perennial question: what do I do with these overripe mangos?


Ingredients for sauce (for blender)

  • 1 ripe mango
  • 1/2 green mango
  • 1 lime
  • 1 jalapeno
  • 2 T soy
  • 2 t allspice
  • 2 t cinnamon
  • 1 t nutmeg
  • 4 cloves garlic
  • 2 shallots or 1/2 onion
  • 2 green onions chopped
  • Tofu not for blender: 2 containers of cubed tofu (you can cube it yourself…). Drained

The Method

1. Cut ripe mango and put into blender

2. Zest and juice lime. Add to blender

3. Add in 1/2 of your red pepper

4. Add in everything else–except your tofu and the green mango. Blend until it forms a smooth paste.

5. Pour sauce into a container or ziploc. Add drained tofu. Marinated r for at least 2 hours (Longer is good)

6. Heat up a skillet with a little olive oil. cook tofu on medium high in 2 batches. It’s ok it gets slightly dark but be careful not to burn it

7. when serving, add green onions, raw bell pepper, and shredded green mango. you could add cilantro and basil, too

Posted in main dish, Recipes, vegetarian | Tagged , , | Leave a comment

Squash Daal

Inspired by a recipe from my father-in-law with some modifications from me–like squash instead of carrots.

serves 4

  • 3 small yellow squash (zucchini, butternut, Accorn, or carrots  all would work)
  • 1.5 cups Masoor Daal (red lentils) 
  • 5 cups water (it absorbs a lot. I started with 3)
  • 1 onions
  • 1 clove garlic
  • 1″ piece of fresh ginger 
  • 1/4 c tomato purée
  • One cinnamon stick
  • 2 tsp garam masala
  • 1-2 tsp sambar powder (add more garam masala if you don’t have this)
  • Chili powder to taste (I used 3 tsp)
  • 1 t asofodeita powder
  • 1 t mustard seeds
  • 1 t turmeric 
  • 1T dried coconut flakes
  • 1 T olive oil
  • A small handful of fresh cilantro 
  1. Heat the oil in a sauce pan. 
  2. Dice onions, ginger,and garlic. Add to the sauce pan and sauté. 
  3. Chop your squash into small pieces–used 1 inch cubes–and add those to your pan and stir
  4. Make a little well in the center of the onion/squash pile. Add the mustard seeds, asofodeita, and turmeric and stir well.
  5. Add the Lentils, water, tomato, coconut, and a cinnamon stick.
  6. Cover and simmer on medium first for about 10 to 15 minutes.
  7. I found that at this point my water was getting absorbed so I added another cup. Reduce heat to low and simmer for another 20 to 30 minutes, adding water as needed.
  8. Near the end, add garam masala, sambar powder, chilli powder and freshly chopped cilantro. You might find that you want more spice or masala, so adjust to your taste. Add a little more coconut If you wish
  9. Salt to taste–I used about 4 or 5 pinches of coarse sea salt. 
Posted in CSA, garden produce, main dish, vegan, vegetarian | Tagged , , , , , | Leave a comment

Zucchini Pad Thai

Pad thai minus the noodles. Zucchini in long strings forms the base of this version. 
 Ingredients 

  • 2 T tamarind concentrate 
  • 1/2 c water
  • 2 T soy sauce
  • 2 T brown sugar (if you have palm sugar, use it) dates would work too
  • chilli powder
  • 1 T tomato paste
  • 2 Zucchinis
  • 1/4 c peanuts
  • 4 green onions
  • 1 carrot
  • 2 eggs
  • 1 clove minced garlic
  • black sesame seeds
  • cilantro
  • thai basil

The method 

  1. Blend together ingredients for the paste. set aside.
  2.  Use a veggie noodle tool, or just a simple peeler to peel zucchini into thin strips. Put into a big bowl

3. Grate or use the tool on the carrot too; put that into your bowl. Chop the green onions finely. chop cilantro and basil. Put half of the basil, cilantro, and green onions into your bowl. Set the rest aside separately

4. Mince your peanuts and set aside–don’t add until serving time

5. Heat a skillet to medium-high (7 or 8). Add olive or sesame oil. Crack your eggs. Mix in some basil, sesame seeds, and salt. beat. pour into hot pan and move around to make a thin layer. Let it set up. it should easily come out of your pan as a thin pancake. Chop into thin strips and add to your bowl.

6. Mix in your sauce. 

7. Set aside or refrigerate to marinate.

8. When ready to serve, top with peanuts, cilantro, basil, and peanuts. toss and enjoy.

Posted in garden produce, low carb, main dish, Recipes, vegan, vegetarian | Tagged , | Leave a comment

Vegetarian Moussaka

This is a modified version of the recipe found in Carla Hall’s book, “Carla’s Comfort Foods”, which itself is a modification of another recipe.

My changes: Using soy (aka “groundless groundbeef”) and seitan (Field roast sausage-style links) instead of bulgar wheat (and eliminating the stock). Substituting creme fresh (Trader Joe’s creme fresh) for most of the ricotta and yogurt. Why? less carbs and more importantly, we had those ingredients laying around.


Ingredients

  • 3 large eggplants, peeled
  • 4 cloves of garlic
  • 1 onion
  • 14.5 oz tomato puree
  • olive oil to brush on to the eggplants
  • 2 vegetarian “sausage” links, ie: Field Roast Mexican Chipotle or 8 oz soy “groundless beef” or seitan crumble (ie: Upton Seitan “Chorizo”)  (note: sometimes I just use this without the sausage links. but if you can only find the less spicy crumbles, use a spicy “sausage” too)
  • 1/2 t cinnamon
  • 1/4 t nutmeg
  • 1/4 t clove
  • 1/4 t all spice
  • 1/4 t oregano
  • 3 eggs
  • 8 oz creme fresh (or sub 1/2 c yogurt and 1/2 c ricotta)
  • 2 T ricotta or 2 T greek yogurt
  • 1/8 c parm (could add more if you want)
  • crushed red pepper flakes
  • fresh parsley for garnish

1. Slice the eggplant into thin long slices.

2. Turn on broiler. Brush with olive oil and lay on baking pan in a single layer (i needed 2 pans that I rotated out). Broil until just browned (careufl not to burn). A few mins in, remove, put in second tray. Flip each slice of first tray with tongs. Remove second tray, put the first back in and repeat…

3. While that’s broiling, make your tomato sauce. Sautee onions. Combine tomato pure, all spice, cinnamon, and oregano. Cook on medium, covered (so it doesn’t splash).

4. In a food processor, grind up the sausage links. Sautee in a skillet until lightly browned.

5, Make your bechamel: combine creme fresh, ricotta, eggs, nutmeg, and a dash of cinnamon.

6. In a casserole dish, make 3 layers: put down sauce, then eggplant, fake meat, then bechemel. repeat 2x.

7. Bake at 350 for 35 minutes

Posted in low carb, main dish, Recipes, vegetarian | Tagged , , , , | 1 Comment

Portland, ME: Veggie options done right 

We’re loving Portland, Maine. It makes the list of places I’d like to live (summer home)–it has ocean (beautiful views from our house), is an interesting, eclectic small city, and has great food.

  • Vinland a locavore, small plates restaurant–food is 100% from nearby areas. No olives so ghee it is. no wheat–it doesn’t grow around here, but oats do and their oat parsnip bread and oat polenta are tasty. Great slow cooked sunchokes and mushrooms. Tasty chilled turnip soup. 


  • Sur Lie: a tapas style restaurant with some delicious veggie options. With a former DC based chef and cocktail program manager. For $15–mushroom soup; A great ginger-peanut cabbage slaw; Crispy egg with baby carrots and the creamiest ricotta. Extra: Brussels sprouts in a special barbecue sauce and oyster mushrooms with shaved jalapeño 


  • Fizz House: cool soda fountain/cocktail bar (ok so not food, but…still good.) try the ginger blood orange soda 


    Posted in Shoutouts, vegetarian | Tagged , , | Leave a comment

    Multigrain Seeded Bread experiment

    I know it has been quite a while–a new shift schedule has wreaked havoc on my free time, making blogging hard. But stay tuned. I’m on vacation and I’ve got ideas.

    This post is inspired by our trip to Vermont, home of King Arthur flour, and Maine, where I had a yummy taste of a locavore Parsnip Oat bread (will be trying to recreate)–if you are ever in Portland try Vinland–99% locavore, organic and most importantly creative and tasty.

      
    Seeded multigrain bread

    This is an updated and modified version of the King Arthur Vermont Maple Oatmeal bread recipe I’ve made several times. Today’s modifications yielded a loaf that is moister, has less sugar, and is more multi-grain than either the original or my previous versions. 

    The first modification was to add a banana and subtract the maple syrup. I ended up adding back about a tablespoon of honey because my banana wasn’t super ripe. I also substituted 1/2 cup rye flour and 1/2 cup oat flour plus 2 T of vital wheat gluten for 1 cup of all purpose flour, and added about 3T of milk (some recipes say to add 1/4 c of extra liquid when you replace AP for whole grain flours, but you have to do so slowly, or let it sit and absorb the liquid for about 30 mins before kneading). 

    My loaf is still not rising as much as I’d like–most likely because the whole grains are heavier, but the addition of the vital wheat gluten was helpful. I might try King arthur’s “dough improver” as well next time. Lastly, I rubbed the whole thing down with a dab of olive oil. 
    In version 2 I switched out 1/4 c white wheat  flour for 1/4 c sprouted wheat 

    The ingredients may seem crazy long but two thoughts: you probably have most of these in your pantry and if not substitute!

    the ingredients

    • 1/2 c rolled oats
    • 3/4 c + 2 T hot water 
    • 1 banana
    • 2 T cinnamon
    • 1/4 c olive oil or butter
    • 3/4 c white whole wheat flour
    • 1 C all purpose flour
    • 1/2 c oat flour (i just grind up oats in a spice grinder)
    • 1/2 c rye flour
    • 2 T vital wheat gluten 
    • 2 1/4 t instant yeast (aka bread machine yeast)
    • 1 1/4 t salt
    • 1 T honey
    • 2 T to 1/4 c milk (i started with 2 T and then added more at the end)
    • 1 T sunflower seeds
    • 1 handful flax 
    • 1 handful chia
    • 1 T black sesame seeds

    The method 

    1. in a stand mixer, mash the banana. Add hot water, rolled oats, olive oil, cinnamon and stir on low to combine. Let stand for 10 mins. Add the remaining ingredients and knead with dough hook, roughly 7 minutes on speed 2 and 3. That kneading time really helps with the rise.
    2. Rub dough with olive oil. As in the original instructions, cover (I put it into a ziploc or wrap it in plastic wrap, then put it back in the mixer bowl, and cover the whole thing with a towel) and let rise for 60-90 mins. I actually let it sit for 2 hrs once and almost 6 another time.  The dough is supposed to double in bulk and be spongy and springy. I found longer wait times help achieve this plus allow more flavor to develop. You could let it sit while you are at work. If you don’t have time consider dough improved.
    3. After the rising, punch down, press into pan (i lined mine with parchment), cover and let sit again for 60-90 mins. (I waited for 2 hrs again). At the end of the rise time, preheat oven to 350. Rub top with olive oil again
    4. Bake for a 35-45 minutes–test the product with a thermometer. Internal temp should hit 190. (I think mine baked for 45-50 mins). 
    Posted in Recipes, vegan, vegetarian | Tagged , , , , | Leave a comment

    Flour-free biscuit experiment

    I came home from work wanting a biscuit. Why? Who knows. But it’s what I wanted. But I didn’t really want a carby biscuit. Here’s what I came up with, an amalgam of a few different recipes. It was really, really tasty, but this recipe has way too much butter in it, so when I try it again, perhaps this weekend, I’m going to try cutting the butter in half (maybe more) and seeing what happens. Stay tuned.  (this is why this is an “experiment”)

    Ingredients

    • 1/2 Cup of almond meal
    • 1/2 cup oat bran
    • 1/2 cup tapioca starch
    • 1/2 T baking soda
    • 2 eggs
    • 3/4 t lemon juice
    • 1/2 cup butter (wowza) it was buttery indeed. room temperature
    • 1/8 cup sharp cheddar cheese
    • 1 T basil and a few leaves of sage
    • salt

    the method

    1. Beat the eggs
    2. Cream the butter
    3. Add in all of the flours and baking soda, slowly
    4. Add in the cheese and lemon juice
    5. Mix in the lemon juice and salt
    6. Refrigerate for an hour or freeze for 20 minutes
    7. Bake at 350 until golden brown

    These came out a little flat–perfect to serve in an egg sandwich. or as the base for a poached egg dish.

    Posted in breakfast, low carb, Recipes, side, vegetarian | Tagged , , , | Leave a comment